Camellias Plant Guide
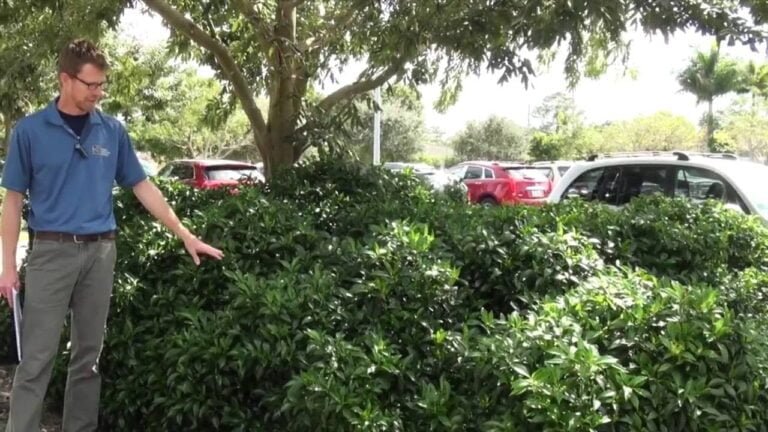
The Camellias plant is a popular part of today’s southern landscapes. Many homeowners love to grow Camellias for their natural beauty and their many functions. Camellias plants can serve several functions in a landscape. They are used as foundation plantings, screens, accent plants, mass groupings, and hedges.
There are many varieties of Camellias plants to be planted, that are available in nurseries and garden centers. This gives many choices for each one’s individual liking and usage.
Camellias Plant Varieties
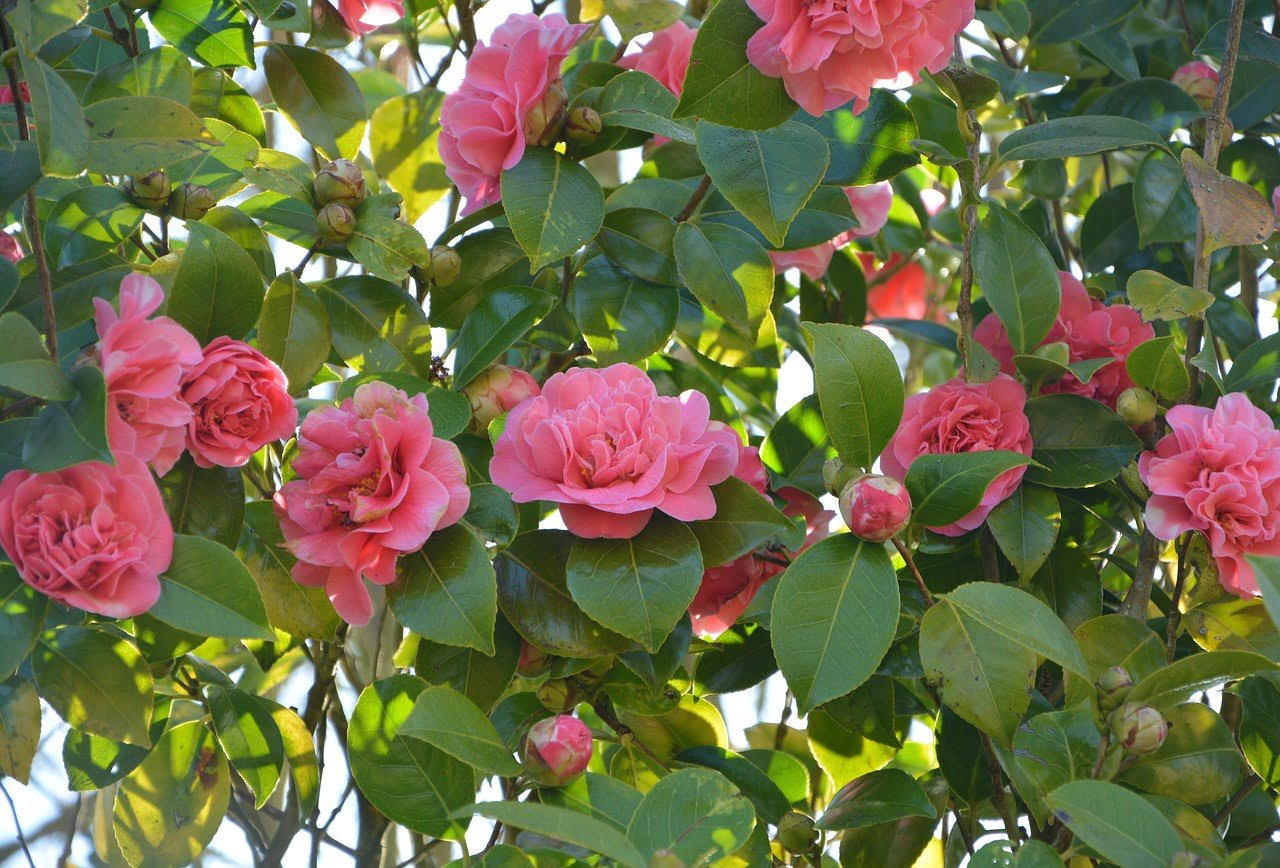
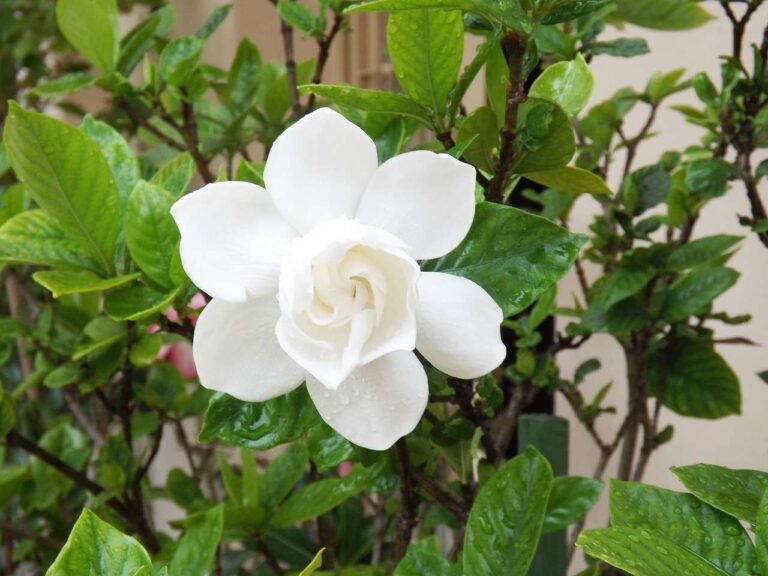
Varieties of Camellias flowers range from single-tiered to double flower forms. Camellia flower colors range from pure white to brilliant crimson, plus combinations of colors with numerous patterns. The Camellia plant size and form range from small to large, compact, bushy, to upright.
The most common types of Camellias plants are the Japonica Camellias and the Sasanqua Camellias. The Camellias Japonica has medium size double-form white flowers, with a bushy plant form. The Camellias Sasanqua has a large size single form flower with a white-edged rose pink color, with a compact upright plant form.
How to Plant Camellias
The Camellias plant should be planted in locations where there is good air circulation. Especially, so during the winter, the cold air can move in and out more freely. However, it is recommended that the area is protected from the cold wind as best as possible.
Planting Camellias on the north or west side of buildings will help them, so they can gradually thaw or warm up before being exposed to sunlight.
Planting Camellias in extreme shade can cause them to grow sparse foliage and produce fewer flowers.
Exposure to full sun all day can cause the foliage to turn a yellowish-green color but will produce more flowers.
It is best to plant Camellias in areas that will receive partial sun or limited direct sun, throughout the day. This way they will grow full, with dark green foliage, and still produce an abundance of flowers.
Camellias should be planted in areas where the soil is well-drained because they Do Not grow well in wet areas.
Planting them in locations that stay wet will cause the root system to be too shallow and stunted. This makes them extremely susceptible to injury during dry periods and limits the roots from absorbing the proper amount of nutrients from the soil. Too much water can cause Root Rot.
The Camellias plant prefers slightly acidic soils. They do best and ideally in soil that has a PH level between (5.0-5.5). However, they can do okay if the PH level is from (5.0-6.5).
How to Fertilize Camellias Plants
Fertilizing Camellias plants should be done 4 times a year.
- Before new spring growth begins.
- After the first growth flush.
- During the middle of the summer.
- Early fall, so any new growth does not get damaged from the first winter cold.
It is best to use a Slow- Release Granular “Acid Formulated – Complete” fertilizer.
Generally, the bag or box should list Camellias on it.
You should be able to find good brand-name products at your local garden centers.
Always read the labels for the correct amount to be applied. Water plants before and after applying fertilizer.
How to Prune Camellias Plants
Camellias Do Not require excessive pruning such as shearing or cutting back. This should be avoided because it will cause too dense foliage, which will block light from the interior branches. Plus extreme shearing ruins the natural plant form of the Camellias plant. Light pruning should be done in early spring and can be done after flowering has finished. Light pruning is done simply by removing any unwanted or dead branches for good branch growth habit, and to keep Camellias growing into its natural shape.
Common Camellias Plant Insects
The most common insects that can injure the Camellias plant are:
- Scale,
- Spider Mites,
- Aphids,
- Thrips,
- Cutworms.
The most effective way to control pests from becoming major infestations is by doing regular visual inspections.
Knowing their habits and identifying a problem early is the key.
Scale:
Scale is found on the underside of leaves. Most common is the Tea Scale which will be noticeable as they multiply. They are white and will look somewhat powdery.
Spider Mites:
Spider Mites are also found on the underside of the leaves. The tops of infested leaves will display a rusty or reddish specking of the green surface.
Aphids:
Aphids live in colonies usually found on the stems and on the buds and flowers, they are yellowish-green in color. When multiplying they are very noticeable, for they are generally seen in clusters. Aphids secret a sticky substance called honeydew, which turns into black sooty mold.
Thrips:
Thrips are hard to detect and see. The first sign of them is the flowers will become distorted, and the stems where the buds are will tend to bend. Eventually, the buds will fall off. If you see unopened buds laying on the ground most likely this is the case.
Cutworms
Cutworms live in the mulch or soil and will come out at night and attack the new growth. They will leave chew marks on the leaves or completely eat the leaves. If you see stems with leaves missing this could be the case. At night you might be able to see them with a flashlight.
A regular program by spraying a liquid Systemic Insecticide can help in the prevention and controlling of insects.
When problems occur spraying a Contact Insecticide properly can stop pests. But you will have to make sure you cover the entire plant, especially underneath the leaves.
You actually have to hit the insects with the Contact Insecticide. Always follow directions on the label of any pesticide you are using, and apply insecticides safely.
Most chemicals can be found at your local garden centers.
Camellias Diseases
Diseases that are common to the Camellias plant are Dieback, Leaf and Bud Gall, Root Rot, and Leaf Spot. Proper identification will determine what to expect and what can be done when the problem occurs.
Dieback:
Dieback is identified by wilting and the sudden death of the new twigs on the plant.
The older parts of the plant can also be infected but generally will die off more slowly. The leaves usually remain on the branches for some time after they die.
The fungus is inside the stem and unfortunately cannot be controlled by fungicides. The diseased branches need to be removed by cutting them off about 6 inches below the lowest visible symptoms of the disease.
The pruning shears need to be sterilized between each cut (Use Pine-Sol brand cleaner, Mix 2-parts Pine Sol to 1-part water).
The branches removed need to be destroyed, do not leave them on the ground.
The wounds on stems more than 1/4 inch in size need to be covered with wound paint.
Leaf and Bud Gall:
Leaf and Bud Gall will appear as thickened or enlarged leaves and buds. Usually, one or more leaves on a single shoot are affected.
The easiest way to control it is by pinching off and destroying the leaves and buds that are infected.
The first sign of Root Rot is the entire Camellias plant or a section will slowly become weak looking and eventually die (turn brown). Once it has progressed to the later stages there is no stopping it from killing the plant.
The plant then should be removed and destroyed.
Soil treatments with liquid fungicide are needed before any new planting is done in that area. Root Rot is often caused by too much water from poor drainage or over-watering.
Leaf spot:
Leaf spot is common on Camellias plants. Spots will vary in size and shape depending upon the type of fungus causing the problem.
Leaf spots usually affect the leaves only.
The leaves can be picked off by hand and new growth will appear. However, it’s best to treat the plant with liquid fungicide anyway.
A regular program of treatments by spraying plants with a liquid fungicide like liquid copper can help in controlling or preventing Camellias diseases.
Conclusion
With its wonderful display of colorful flowers, the Camellias plant adds beauty to any home. Whether used as hedges, accent plants, or mass groupings, Camellias plants will be an attractive part of any landscape.
With so many varieties to choose from you can find satisfaction to your liking.
Growing Camellias will always be a popular part of landscaping.
Learn what to look for when purchasing quality plants.
https://floridalandscapingtoday.com/how-to-purchase-quality-plants-video
Can I grow camillias as in Naples Fl. And what varieties
Teri,
Camellias are generally grown successfully in North or Central Florida. Contact your local county extension service and they will tell you if they recommend planting them in your area. You can also check your local garden centers or nurseries to see if they carry them, if they don’t then the chances are they generally are not planted in your location in Florida.
Kurt